In college I majored in Art with an emphasis in ceramics. I recall one day being elbow deep in muck mixing a batch of clay with a classmate. Mixing clay is both a time consuming and physically laborious process. My mixing partner, although known for her obnoxiously exuberant zest for life, was a very kind girl. She chattered on about how much she loved mixing clay; how much she loved every step of the process of ceramics. Mixing, wedging, throwing, hand-building, firing, glazing, firing again... I can't say I felt the same way. I
liked the process, but I realized I lacked the passion that she and many of my other classmates had for it. I rarely felt compelled to stay in the studio later than necessary. I did the projects required and played around some, but didn't seem to 'live' there like the others. My last semester I needed an additional studio class and was able to get into metalsmithing. Within the first week I realized I could relate to my classmate--I was passionately in love with every single step of the metalsmithing process. I lived in the studio trying to create as much as I could in the short 4+ months I would have access not only to the tools but knowledge of a phenomenal professor. I knew this was what I wanted to do. I thought I'd share with you the process I love. Like ceramics, it is time consuming and physically laborious. But I find joy in every step. Click on the pictures for more detail. Enjoy!

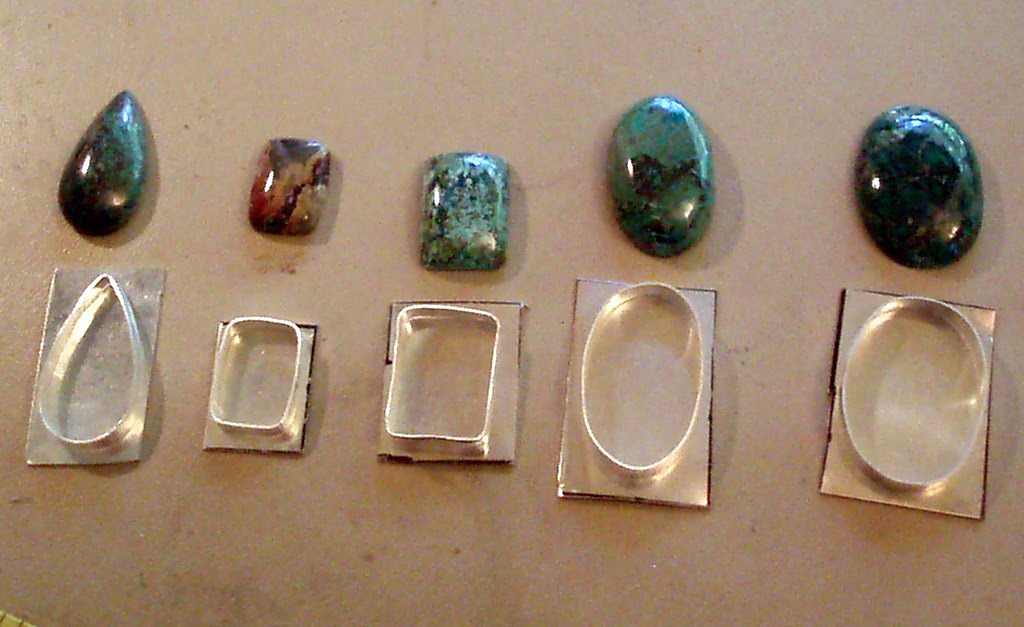
Every piece is born out of raw material--sheets of metal and spools of wire. After selecting the stones to be set the raw material is fitted and cut for each stone.

Once everything fits perfectly (this process can take hours to complete) the pieces are put together with fire, flux, and solder. Each joint is soldered together and cleaned in a heated acid solution called "pickle". Soldering, when done correctly, is a fast process but comes with it's own challenges and problem solving.

Embellishing the setting is one of the best parts. Precision and a tight fit are the keys to a well embellished piece. I enjoy using 'fancy' silver wires and recycling scrap by melting it into little balls to embellish my pieces.

After the bezel is embellished it is made into what it's meant to be--rings, pendants, cuffs, etc. Here I have illustrated creating ring shanks-measuring and sawing the silver, annealing (heating it to make it more pliable), shaping/filing it, and soldering it together.

Once the ring is soldered together it must be reshaped using a ring stretcher to make it round. Then it must be filed and sanded to clean it up and remove all scratches in the metal. Once it's shaped to fit the ring it is carefully placed onto the bezel and soldered on.

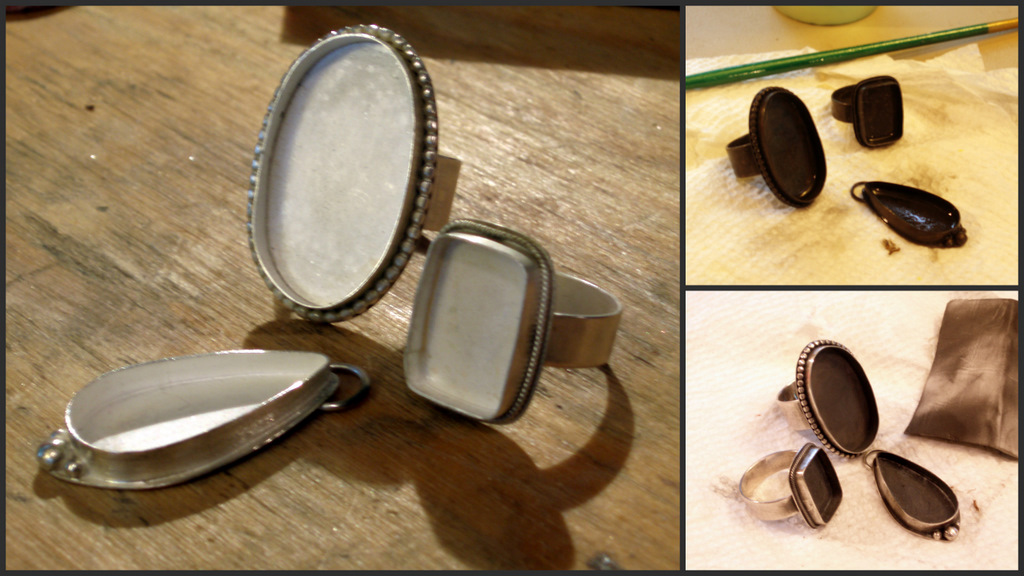
Hours and hours (and hours and hours) after the start, construction is complete! I almost always oxidize my pieces to add depth and enhance texture. This is where the pieces are blackened (top right). Using a special cleaning pad I remove a lot of the blackness so the silver shines through (bottom right)

Next comes finishing the setting by either tumbling (my preference) or polishing by hand. I use a mix of stainless steel "shot" and a burnishing compound to tumble my pieces. This smooths and polishes for me and takes hours off the finishing process. Tumbling takes 30 min to an hour.

And now the best part of the entire process! Opening up the tumbler and pulling out the finished, super shiny settings, popping the stones into place, and setting them. "Setting" means pushing the rim of the bezel tightly over the stone using a bezel roller and burnisher (although there are other ways to set stones). If the bezels fit the stone just right this process doesn't take very long. However, if the bezels don't fit perfectly this is one of the most frustrating processes EVER! And Voila! The piece is finished and ready to enjoy.


I hope this was interesting--or at least gave you a greater appreciation for that handmade piece of jewelry you love. Peace.